Sometimes item descriptions are wrong, and sometimes that are
reeeaaaaallllllyyyyyyy wrong. I thought I was buying a 270 since that's
what the auction was listed as, and the picture was to bad to see the
harp clearly. This is what I ended up getting in the 270 case. When I
got it I tossed it on the workbench and forgot about it. Recently I was
talking online with some folks about fixing up harmonicas and I wanted
to try out several products which used in conjunction with each other
made for a really nice outcome.
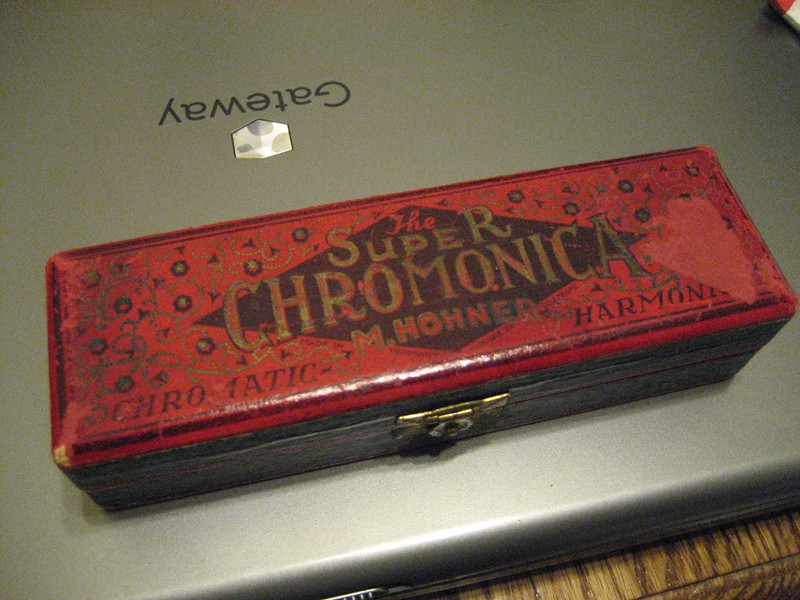
So here's what I saw in the auction, not this exact picture, but the
picture showed the 270 case.
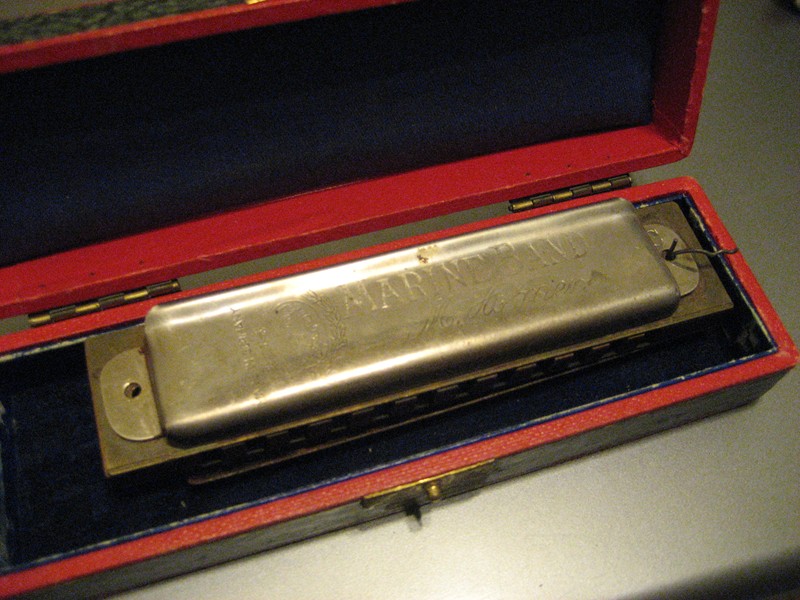
Here's what was in the case when I openend it. As I'm sure you can
guess I wasn't to happy about it.
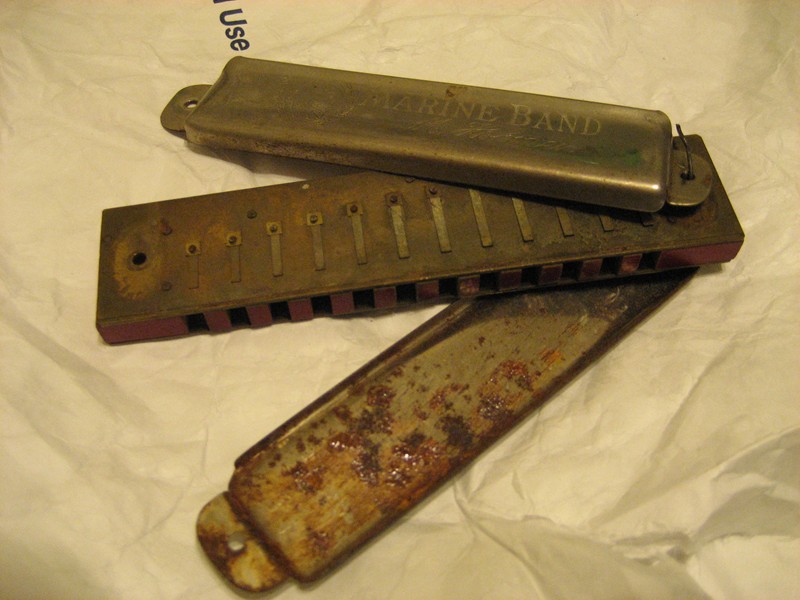
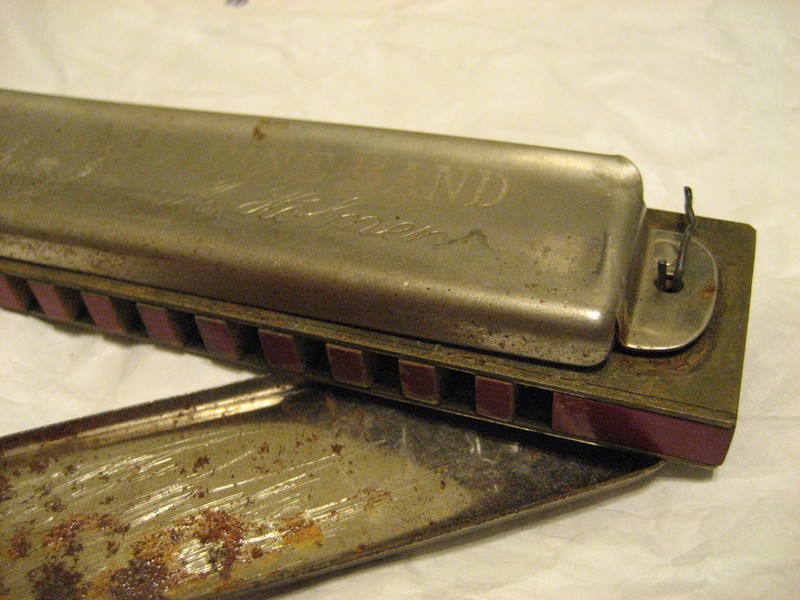
This is the condition the harp was in when I took it out and looked at
it. It was so bad that I had to take a picture to show to a friend of
mine.
This is the kind of harp that most folks would just toss in the trash.
It was awful. I don't know where it originated, or how old it is, or
what kind of conditions it had been left in but man oh man what a train
wreck.
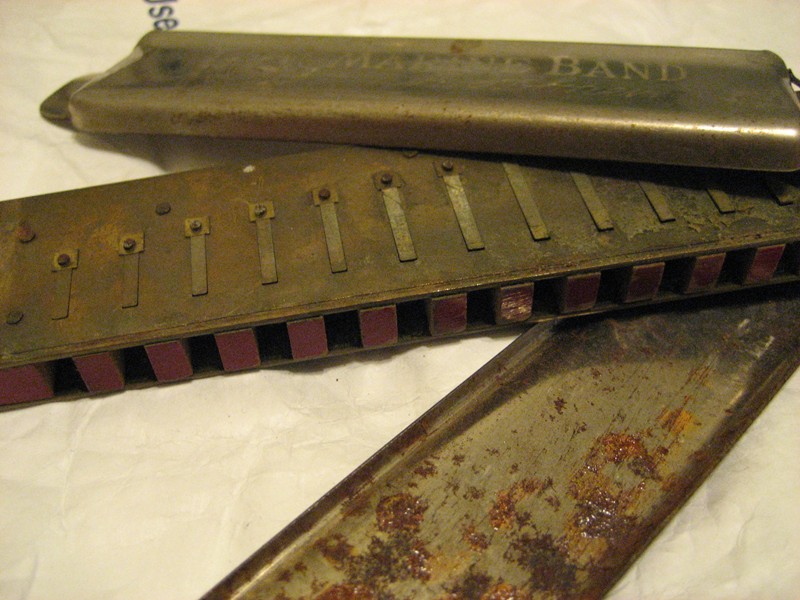
As you can see there weren't any coverplate screws with it,
instead someone in their infinate wisdom though that bailing wire would
be a good substitute.
The Restoration
Here's a description of some of the things I did to restore this harp.
The first thing was to tear it all apart, the nails that were holding
it together were terribly rusted and a couple broke off which after the
reed plates were removed required the use of a small pair of pliers to
remove the remainder of the nails. The reed plates and cover plates
were the first things to be addressed. To start with I soaked the reed
plates in CLR for a few minutes with constant agitation. The CLR can be
quite harsh on the brass but it's really effective at getting the
initial crud off of the reed plates. I then rinsed the reedplates, and
you want to make sure you get them really cleaned off. Then it was on
to the next step. I use brasso to further clean the reed plates by
applying the brasso to the plates and then using my fingers to work the
brasso over them. Of course I'm sure it goes without saying... wear
gloves... and make sure you do that in a place with fresh air because
the brasso has a VERY strong odor to it. So I work the brasso over the
whole reedplate rubbing them with my fingers to clean the surface and
work the brasso into all the nooks and crannies. After you feel it's as
clean as it's going to get then rinse the plates again.
The cover plates were soaked in the CLR for about 30 minutes total.
This was to try and neutralize all the rust that was on the
coverplates. After soaking and a good rinse with clean water both the
cover plates and the reed plates were clean in an ultrasonic cleaner
with a bit of anti-bacterial soap mixed with the water. The parts were
run through several 8 minute cycles. Taken out and again rinsed. After
drying they looked pretty good, but to take it a step further and make
the plates look even better I took a pencil and used the eraser to
clean up the plates even further and to remove some of the darker
stains. The eraser is a great way to clean the brass because it's
abrasive enough to really remove tarnish and discoloration well, but
without damaging or removing material. So at this point you're probably
thinking ok we're finally done........ not yet. The next step is the
final one in restoring the plates to a new condition. I use a product
called neverdull, which comes in a can and it's basically a coton
material like a cotton swab that's soaked with a solvent. I whipe the
reed plates down really good with the neverdull, you just need to tear
off a small amount of it and use that until it's good and dirty
looking. Whipe down the reed plates with the neverdull and then when
you're happy with the results whipe with a clean paper towel. Ok one
more step.... Next I take the reed plates over to my buffing wheel. Now
this is important !!!! When using the buffing wheel on a bench mounted
buffer you MUST use a loose wheel, not a sewn wheel. The loose wheel is
less prone to grabbing the plate while you're working on it and is much
less aggresive. So what we're going to do is use the buffing wheel to
remove more of the neverdull and to help polish and clean the plates
even more. When doing this make sure that you always work with the
rivet end of the reeds at the top so that as the wheel spins it starts
at the rivet end and works towards the free end, and use very light
pressure. After both sides of the reedplates have been cleaned with the
buffing wheel it's time for the final wash and back into the ultrasonic
cleaner one more time. The pencil eraser used earlier can be used on
the edges of the reedplate to clean and restore their color as well. I
think it's important to mention that you don't need a bench mounted
buffer, and if you're doing this for the first time I would recommend
using a dremel tool with one of the polishing wheels. When I first
started working on harps and building my brass custom harps I did all
of my polishing with a dremel, so it's more than adequate for the what
we're doing here.
The cover plates were very rusty on the insides surfaces. The soak in
CLR seems to help neutralize the rust and clean it up to a certain
point. To further clean the rust off I use a wire wheel in the dremel
and clean all the rust off. The surface may still be pitted but the
goal is to remove any discoloration and visible rust. After that was
done it was back over to the buffing wheel to polish the coverplates.
For this I use a sewn buffing wheel with a rouge compound. Be
very careful when doing this. A buffing wheel can be one of the most
dangerous tools in the shop, because if it gets ahold of that
coverplate it's going to rip it out of your hands, and when it does can
very easily take a finger with it if you're holding a sharp edge. Again
for those new to this kind of work a dremel tool with a polishing wheel
would be a better choice.
So we've cleaned up all the parts and now it's back to the sink for a
finaly cleaning and ultrasonic bath.
The comb was very cruddy and very normal for a really old harp that's
been mistreated, to say the least. I wanted to use the original comb
because I wanted to show people what could be done using the original
parts. Sure a new custom made comb would be great, but if you don't
have the means to make them and don't want to shell out the money for
one there's no reason you can't reuse the comb that's in there. So to
start with I went to the workbench and started the sanding process. I
have a granite tile that I use for sanding combs. I took a piece of 220
sanding paper and used a light coat of spray adhesive to stick it to
the granite. Then with a piece of steel placed on top of the comb to
help with even pressure I started sanding the top and bottom surfaces
until the gunk, discoloration were gone, and the flatness was to my
liking. Then I use a thin flat file to clean the insides of the slots
to clean off any gunk in there, I want to see clean wood when I'm done
with this step. Then I sanded the coloring off the edges of the comb
using the sandpaper tacked down to the granite. this needs to be done
slowly so you don't remove to much material, basically just get
the coloring off and nothing more. Then it was off to the belt sander
to chamfer the corners on the tines of the comb.
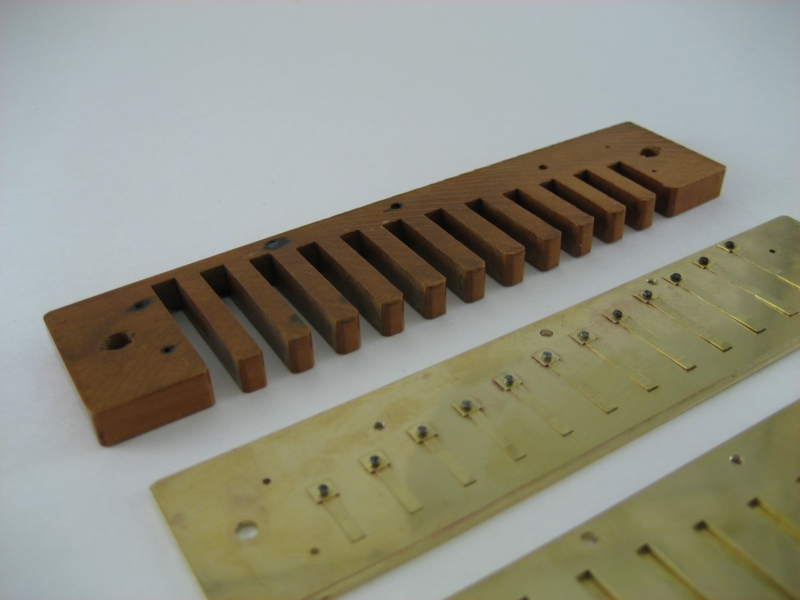
So now we've got clean reed plates, cover plates, and a freshly sanded
comb. The next step was to drill the comb and reed plates for screws.
The nails that were originally in the reed plates were so rusted that
there was just no reusing them. So I clamped the reedplates in place on
the comb and went to the drill press to drill holes for the screws. For
some reason the nail holes on the draw plate are nice and equally
spaced and good locations for the screws, so I use those as the
positions for the screws. I clamp the plates to the comb and then drill
through the reedplate, into the comb, all the way through, and out
through the blow plate. I drill the holes with the appropriate size
drill bit based on the size of screw I'm going to put in. In this case
I used brass 1-72 hex head screws. After those holes were drilled I
took the pieces apart and drilled the through holes in the plates and
comb. Next I tapped the holes and we're done.
I like to have the corners on my harps either with a chamfer or rounded
off, so I temporarily install the reed plates and head to the belt
sander to round off the corners. When that's done it's time to move
onto sealing the comb.
Because of the age of the harp I like to pre-seal the entire comb with
a couple light coats of instant drying laquer. I get this at my local
hardware store and it works great. The laquer soaks into the wood and
seals it without a lot of buildup. Remember we spent time trying to get
the top and bottom surfaces of the comb nice and flat so we don't want
a bunch of buildup on there and undoing the work we did. After the
laquer has dried I start applying the finish to the edges of the comb
and the insides of the slots. I use Cabot water based poly for this, it
dries very fast, has a great finish, and it's durable. I apply it to
the insides of the slots with a regular small brush and after a couple
of coats inside the slots I use a foam brush on the outer edges. I put
on 4 coats this way with about 5 to 10 minutes drying time between
coats. Generally by the time I've finished the last section the first
is dry enough to touch, so I let it set about 5 to 10 minutes between
coats.
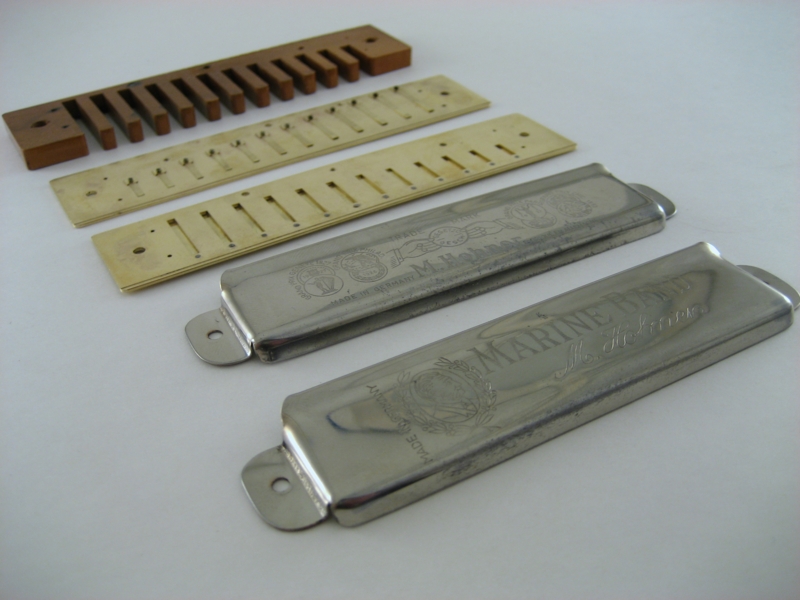
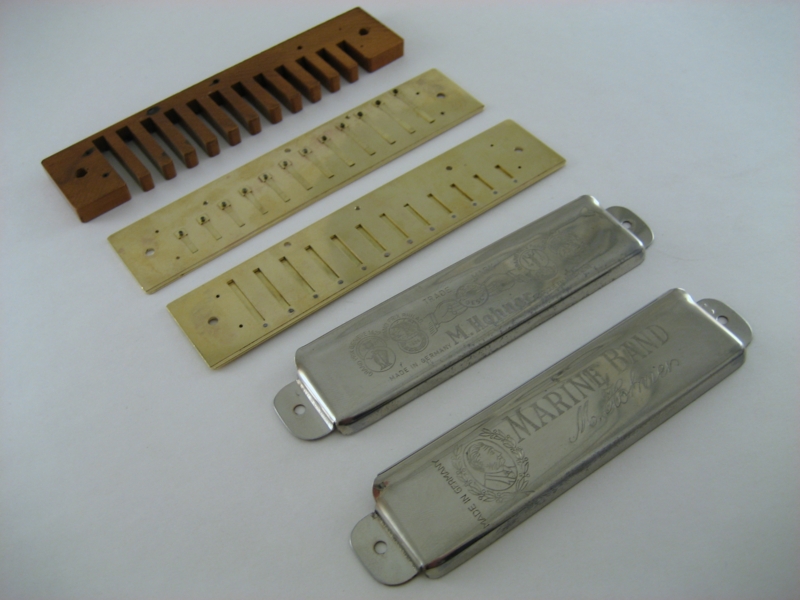
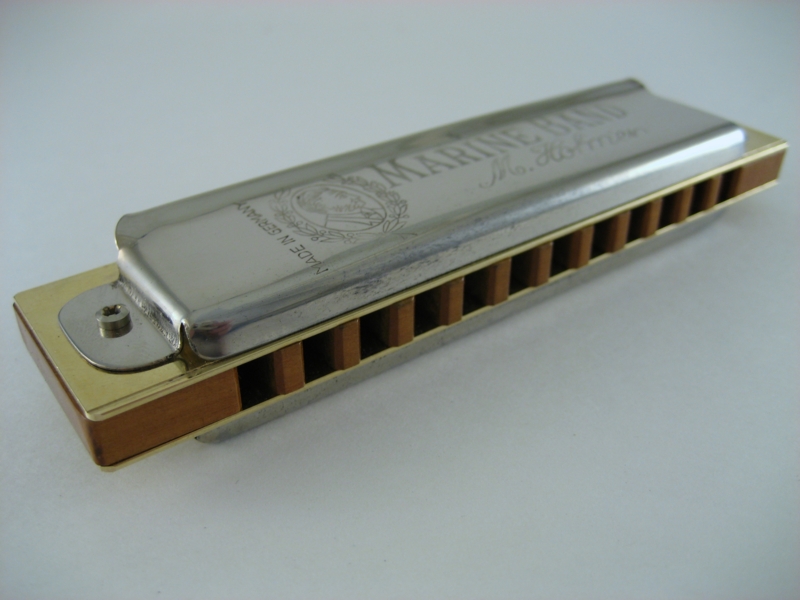
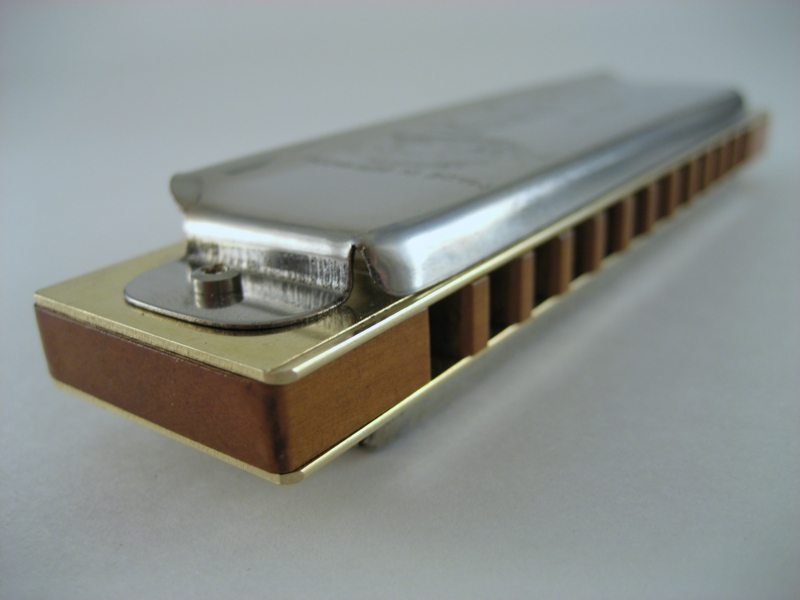
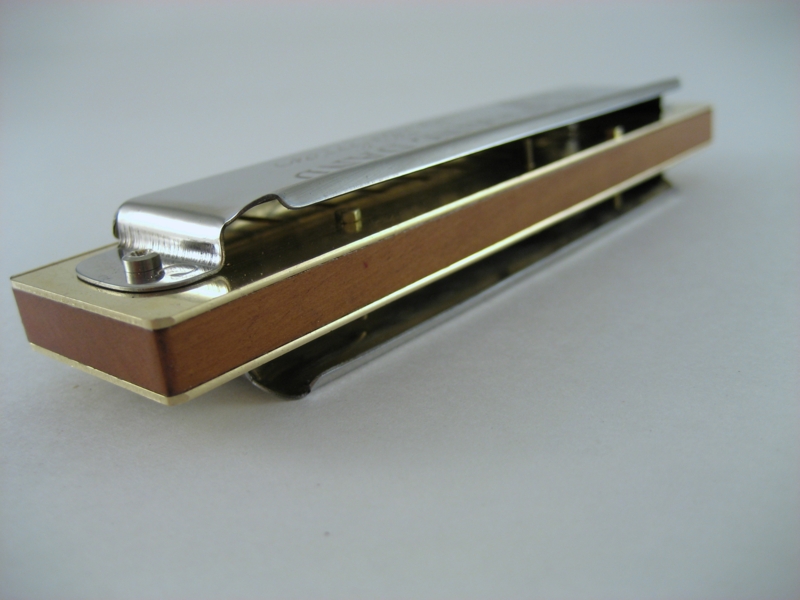
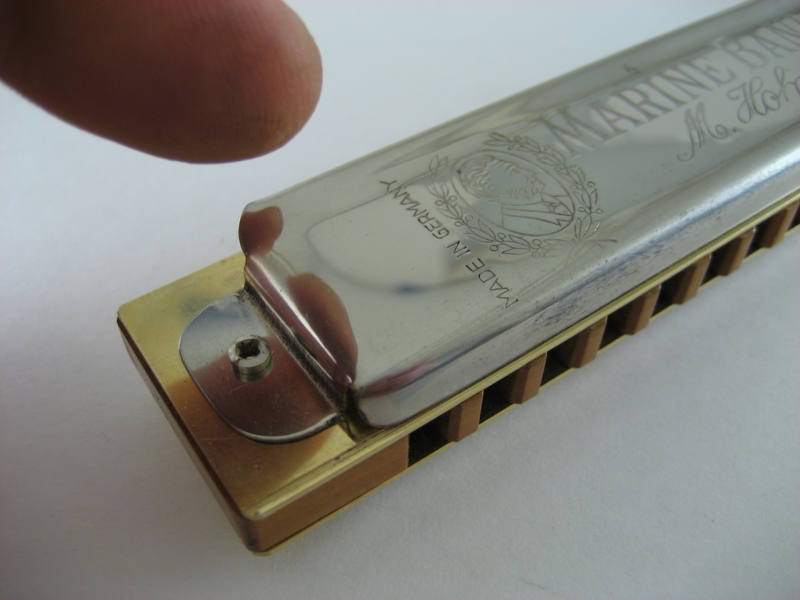
So after it was all dry it was time to reassemble the harp. Below are
the after pictures.
Now it's on to working on the reeds.
Hope this was informative, and remember just because harp looks like
it's ready for the trash bin don't be in to big a hurry to throw it
away, but if you're set on throwing it away throw it my way.........