
Neverending Project
Homebrewing !
This
is one of my all time favorite hobbies. I got started in it about 3 or
4 years ago and while I'm no where near as advanced as many brewers out
there I still get a great amount of enjoyment from it.
I spent two years in England while in the Air Force and while there I was introduced to different ales, stouts, porters, bitters, cider, etc. And after being back in the states a number of years I really missed the variety of the beers that I enjoyed while overseas. Many people get into homebrewing for different reasons, for me it was the variety and the ability to experiment, but whatever the reason if you've been thinking about getting into the hobby I would highly recommend you try it.
I got in a new recipe kit yesterday from my favorite homebrewing supplier, Midwest Supplies, which is located in Minnesota. I've bought all of my equipment from them as well as all of my ingredients. I'm sure at some point I'll try other companies to see what they have but I guess I've always been so happy with the service I've gotten from Midwest that I've just never been in any hurry to try anyone else.
So let's get started.....
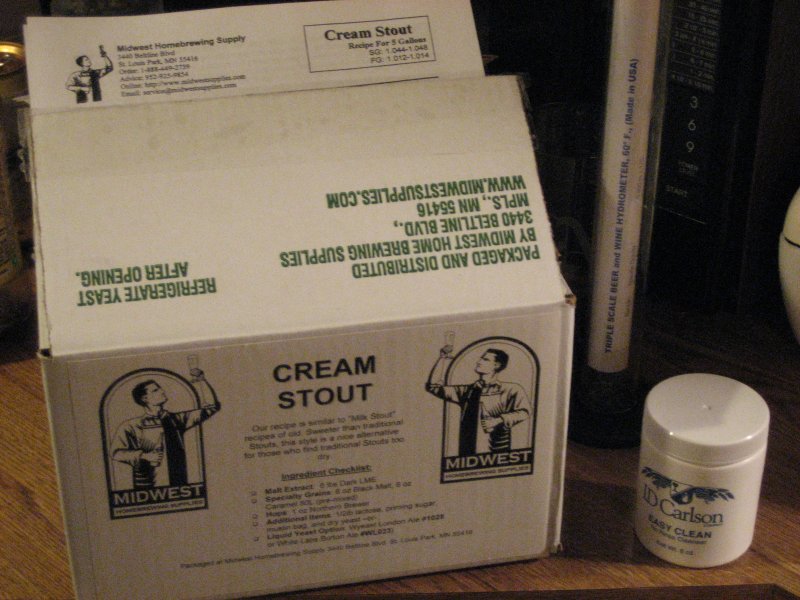
I received my kit yesterday afternoon and the kit that I bought was for a cream stout, which I've never tried. It's supposed to be milder than a traditional stout and I thought it would be a good way to introduce my friends to darker beers.
The kit comes in a nice box with all the ingredients that you need to brew five gallons of beer.
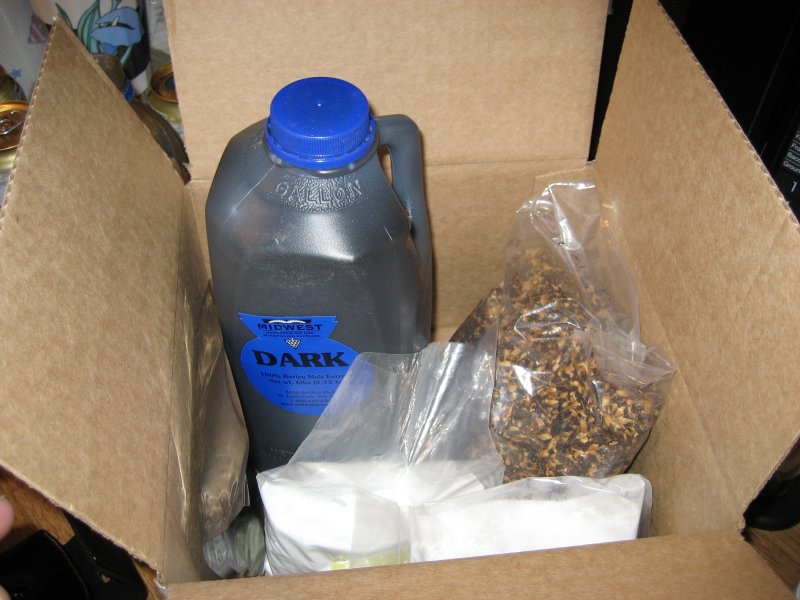
Here you can see the dark malt extract, the specialty grains (man I love the smell of them) the lactose, the priming sugar (for bottling) and you can kind of make out the package of hops.
First thing I had to do was get out all of my equipment and sanitize everything.

The white box has my primary fermenter, bottling bucket, hose, racking cane, hydrometer, bottle capper, etc. , etc. The first tall box behind that holds my 5 gallon glass carboy, the box to the right of that has my 2.5 gallon party pig, and the boxes behind those are all bottles. And of course the big pot on top of those is my brew kettle.
So after sanitizing everything I first fill my brew kettle with 2 gallons of filtered water. I dont' like the taste of the water here so I use a PUR water filter.
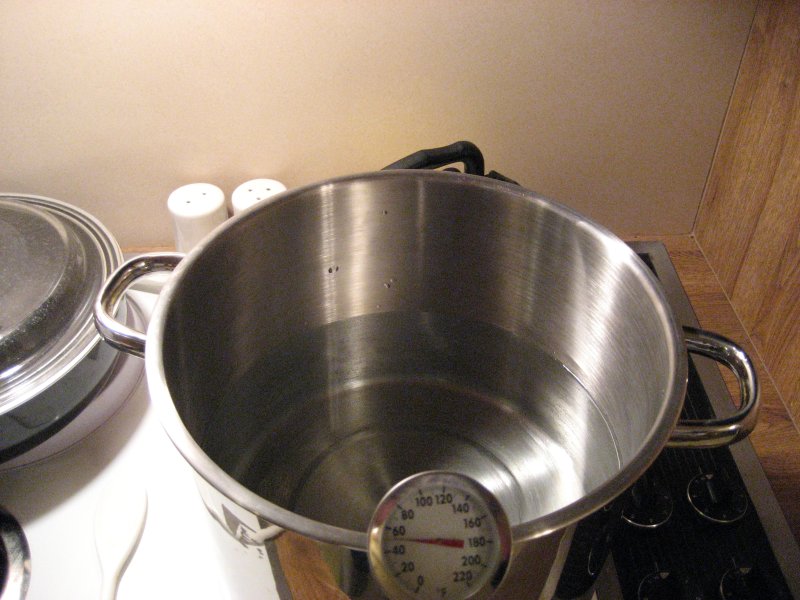
As you can see I already have my thermometer clipped to the side of my brew kettle, we'll need this when we start steeping the specialty grains.
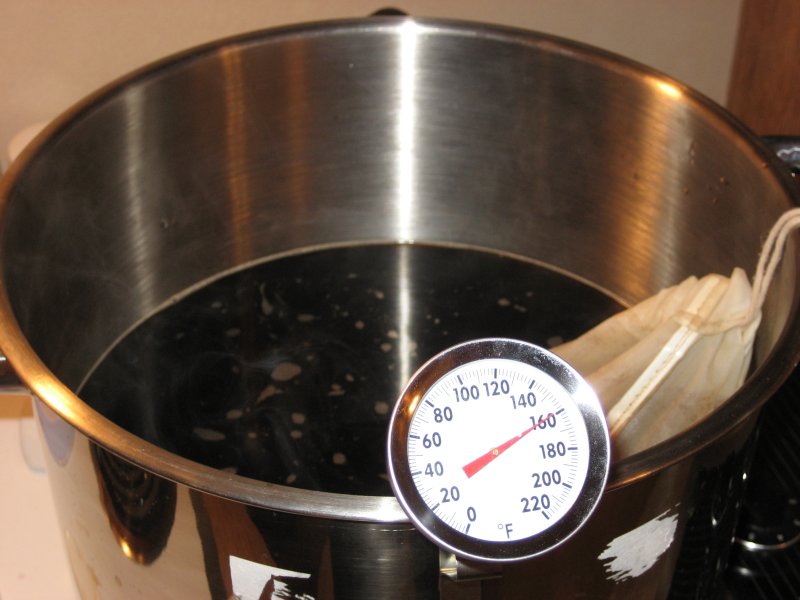
Here you can see I've started steeping the grains. I use a reusable nylon grain bag even though the kit comes with a disposable grain bag. I prefer the reusable one because I can also use it with my hops. In this picture the temp is a bit high, it should be around 155 degrees F but this was the first time I've brewed in my new house on my new stove and it takes a bit of getting used to to get the temp just right. Fortunately this was the highest it got.
The specialty grains were steeped at 155 degrees for 30 minutes. When you're done steeping the grains you remove the brew kettle from the heat and you can start adding the malt extract.
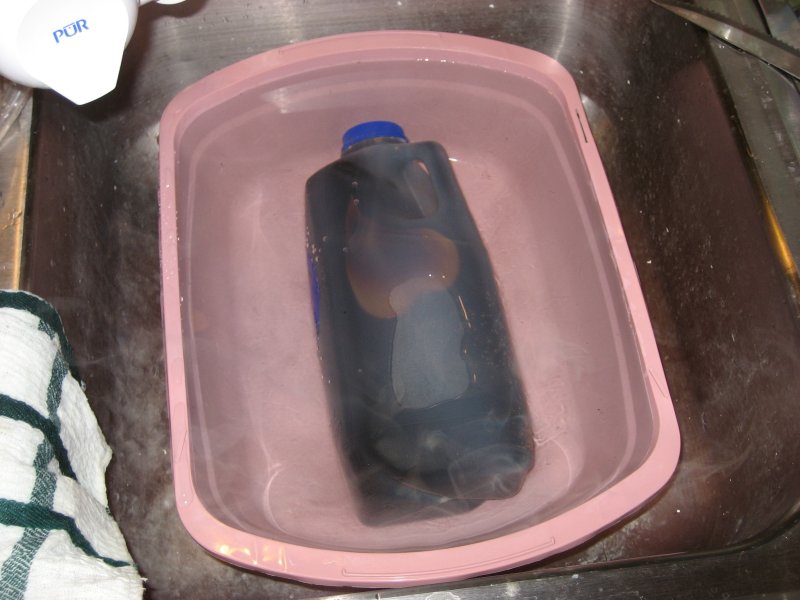
What I'm doing in the picture above is I have my malt extract sitting in a tub of really hot water. The malt extract is essentially a syrup and heating it this way makes it so much easier to pour from the jug.
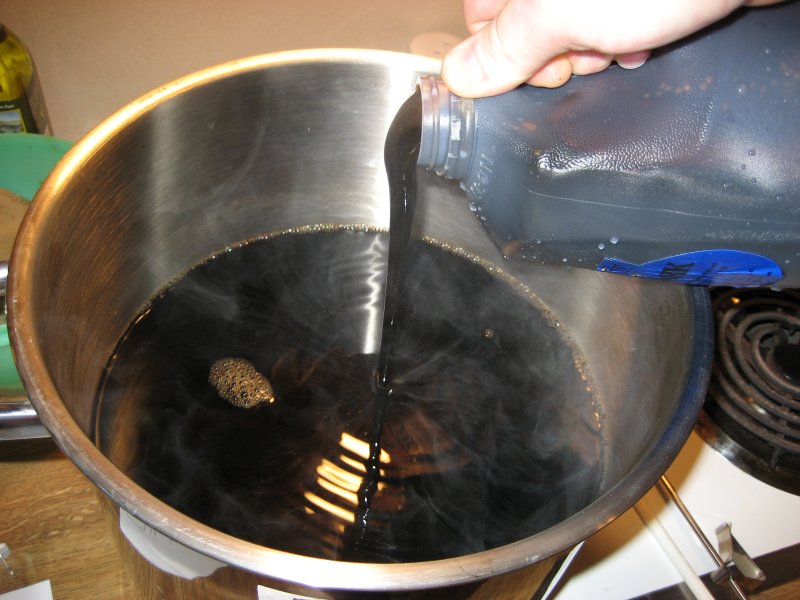
So now that the grains have been steeped for 30 minutes and the brew kettle removed from the heat I start adding the malt extract. You want to take the brew kettle off the hot burner when doing this so the malt extract doesn't scortch on the bottom while you're pouring it in.
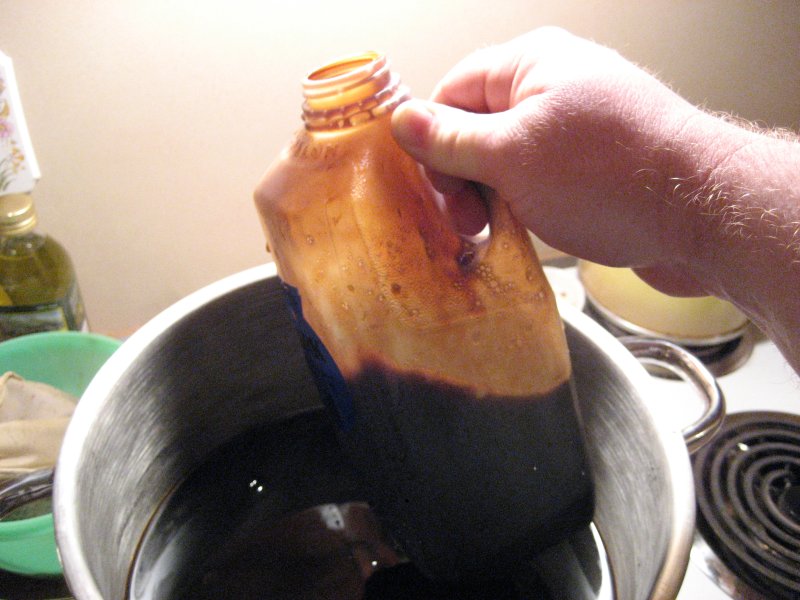
To make sure I get all the malt extract from the bottle I'll dip it into the pot and fill it part way with the hot water the grains were steeped in, slosh it around a bit and then pour it out. It really does help get all the extract from the bottle, just be careful not to burn yourself.
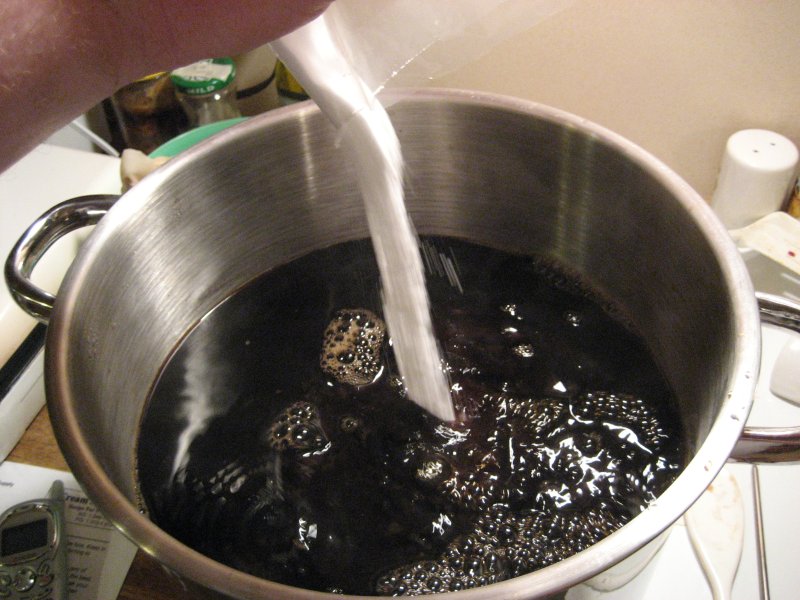
This recipe being a cream stout required the addition of powdered lactose, so again while the kettle is off the hot burner I slowly add this in.
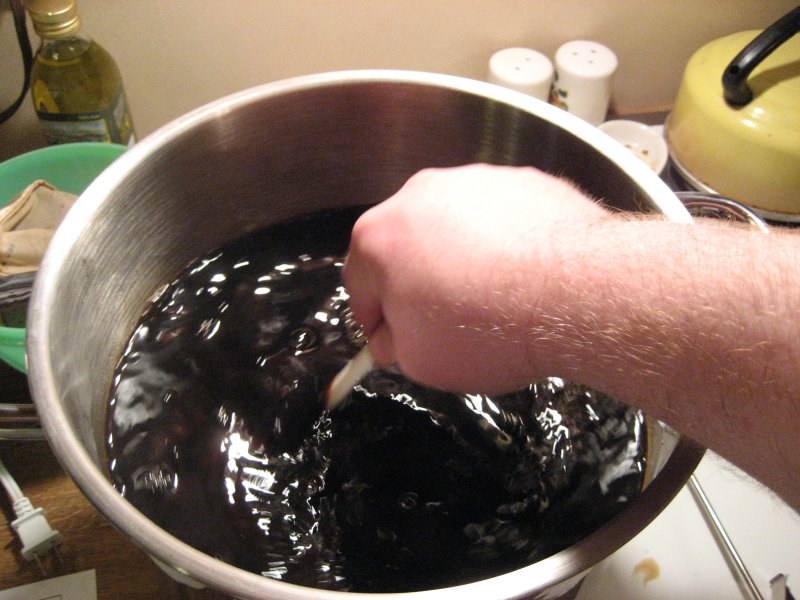
You want to make sure you have this mixed up really well before returning to the burner. If it's not mixed up well then malt extract that has settled to the bottom of the kettle can scortch.
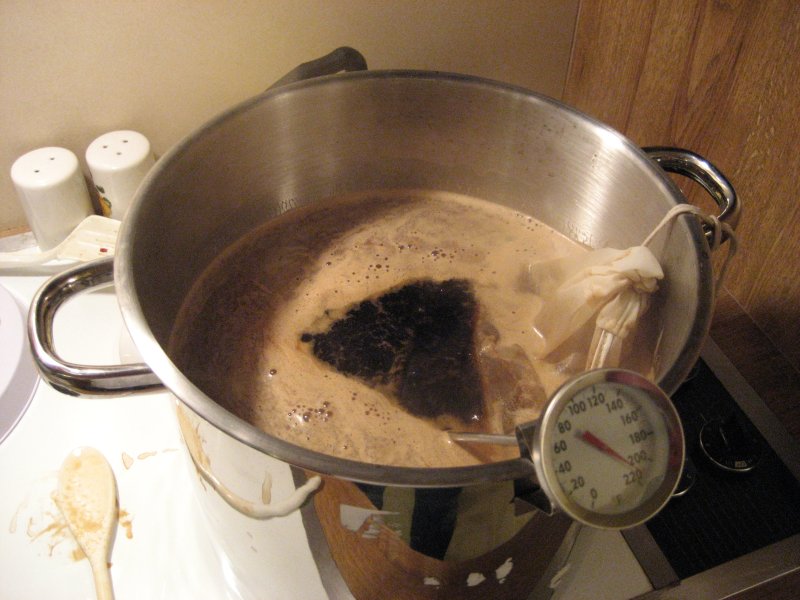
So now that the malt extract and the lactose has been added it's time to return the pot to the burner. You can see that a rolling boil has started and I've cleaned out my gain bag which now has the hop pellets in it.
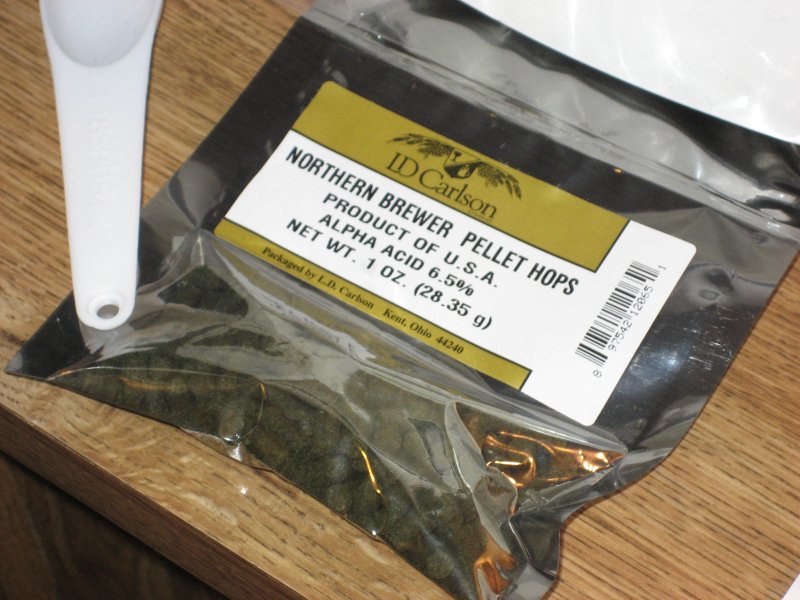
The hops come in pellet form and are added to the grain bag after it's been cleaned out, alternatively you can just add the hops pellets to the boiling wort but using a grain bag makes things easier. Since this recipe doesn't use aroma hops, which are added to the boil in the last couple of minutes, I elected to boil the wort for a full hour.

Here you can see the wort boiling nicely. The light brown stuff around the edge of the pot is called traub (pronounced troob) and I like to scoop it out as the boil goes along. I think it produces a better tasting beer.
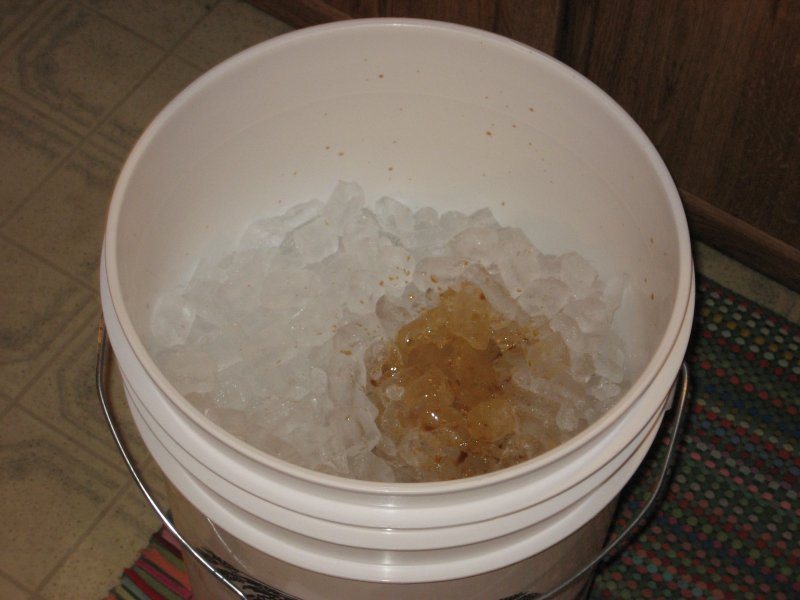
Here I have the primary fermenter filled with ice. You want to cool the wort from boiling temperature down to the yeast pitching temp as quickly as possible. I've seen other homebrewers do this but I won't do it again. It cooled my wort down to much, so I had to raise the temp back up a bit before I could pitch the yeast. I think building a wort chiller is going to be a future project.
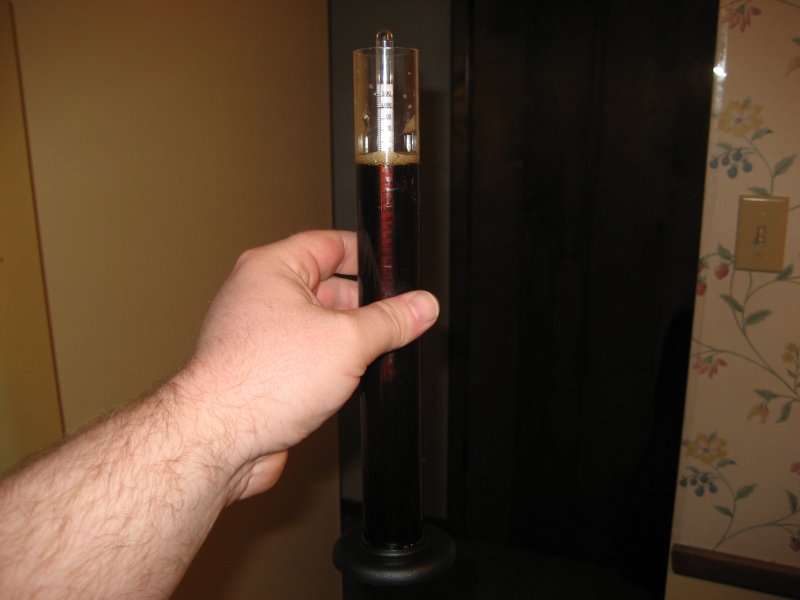
So after getting the wort temperature right it's time to take a hydrometer reading. The hydrometer has a graduated scale on that tells you the specific gravity in relation to water. The more fermentable sugars in the wort the higher the specific gravity, and the higher the potential alcohol.
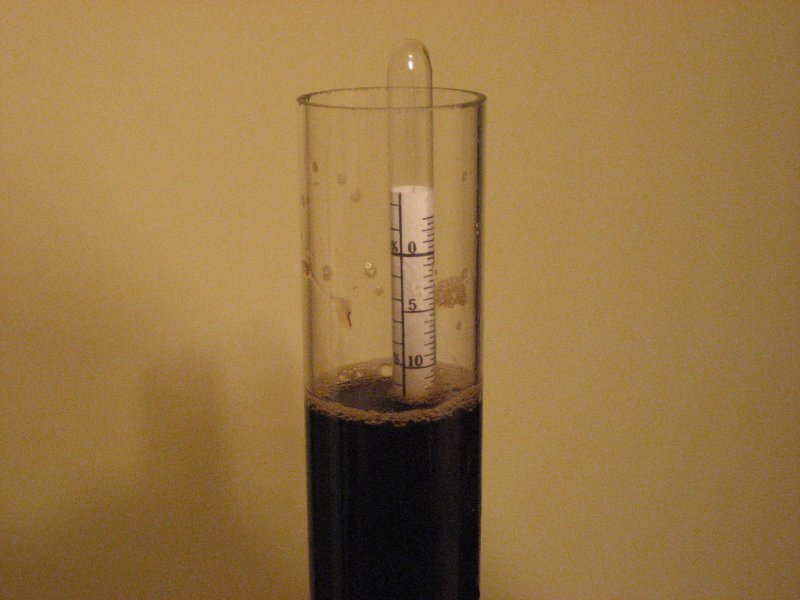
Here you can see the scale on the hydrometer. This is where you take your specific gravity reading. This recipe has a starting specific gravity of 1.048. You'll want to note this in your log book.
So here it is, the wort has been brewed, the specific gravity has been taken, and the yeast has been added. The airlock on top is to allow the CO2 to escape without letting any air back into the fermenter. Now it's time to wait 4 to 7 days and then transfer it to the secondary fermenter the glass carboy.
So check back soon as I'll keep the page update with pictures as the brew progresses.
Till next time.....
BACK
I spent two years in England while in the Air Force and while there I was introduced to different ales, stouts, porters, bitters, cider, etc. And after being back in the states a number of years I really missed the variety of the beers that I enjoyed while overseas. Many people get into homebrewing for different reasons, for me it was the variety and the ability to experiment, but whatever the reason if you've been thinking about getting into the hobby I would highly recommend you try it.
I got in a new recipe kit yesterday from my favorite homebrewing supplier, Midwest Supplies, which is located in Minnesota. I've bought all of my equipment from them as well as all of my ingredients. I'm sure at some point I'll try other companies to see what they have but I guess I've always been so happy with the service I've gotten from Midwest that I've just never been in any hurry to try anyone else.
So let's get started.....
I received my kit yesterday afternoon and the kit that I bought was for a cream stout, which I've never tried. It's supposed to be milder than a traditional stout and I thought it would be a good way to introduce my friends to darker beers.
The kit comes in a nice box with all the ingredients that you need to brew five gallons of beer.
Here you can see the dark malt extract, the specialty grains (man I love the smell of them) the lactose, the priming sugar (for bottling) and you can kind of make out the package of hops.
First thing I had to do was get out all of my equipment and sanitize everything.
The white box has my primary fermenter, bottling bucket, hose, racking cane, hydrometer, bottle capper, etc. , etc. The first tall box behind that holds my 5 gallon glass carboy, the box to the right of that has my 2.5 gallon party pig, and the boxes behind those are all bottles. And of course the big pot on top of those is my brew kettle.
So after sanitizing everything I first fill my brew kettle with 2 gallons of filtered water. I dont' like the taste of the water here so I use a PUR water filter.
As you can see I already have my thermometer clipped to the side of my brew kettle, we'll need this when we start steeping the specialty grains.
Here you can see I've started steeping the grains. I use a reusable nylon grain bag even though the kit comes with a disposable grain bag. I prefer the reusable one because I can also use it with my hops. In this picture the temp is a bit high, it should be around 155 degrees F but this was the first time I've brewed in my new house on my new stove and it takes a bit of getting used to to get the temp just right. Fortunately this was the highest it got.
The specialty grains were steeped at 155 degrees for 30 minutes. When you're done steeping the grains you remove the brew kettle from the heat and you can start adding the malt extract.
What I'm doing in the picture above is I have my malt extract sitting in a tub of really hot water. The malt extract is essentially a syrup and heating it this way makes it so much easier to pour from the jug.
So now that the grains have been steeped for 30 minutes and the brew kettle removed from the heat I start adding the malt extract. You want to take the brew kettle off the hot burner when doing this so the malt extract doesn't scortch on the bottom while you're pouring it in.
To make sure I get all the malt extract from the bottle I'll dip it into the pot and fill it part way with the hot water the grains were steeped in, slosh it around a bit and then pour it out. It really does help get all the extract from the bottle, just be careful not to burn yourself.
This recipe being a cream stout required the addition of powdered lactose, so again while the kettle is off the hot burner I slowly add this in.
You want to make sure you have this mixed up really well before returning to the burner. If it's not mixed up well then malt extract that has settled to the bottom of the kettle can scortch.
So now that the malt extract and the lactose has been added it's time to return the pot to the burner. You can see that a rolling boil has started and I've cleaned out my gain bag which now has the hop pellets in it.
The hops come in pellet form and are added to the grain bag after it's been cleaned out, alternatively you can just add the hops pellets to the boiling wort but using a grain bag makes things easier. Since this recipe doesn't use aroma hops, which are added to the boil in the last couple of minutes, I elected to boil the wort for a full hour.
Here you can see the wort boiling nicely. The light brown stuff around the edge of the pot is called traub (pronounced troob) and I like to scoop it out as the boil goes along. I think it produces a better tasting beer.
Here I have the primary fermenter filled with ice. You want to cool the wort from boiling temperature down to the yeast pitching temp as quickly as possible. I've seen other homebrewers do this but I won't do it again. It cooled my wort down to much, so I had to raise the temp back up a bit before I could pitch the yeast. I think building a wort chiller is going to be a future project.
So after getting the wort temperature right it's time to take a hydrometer reading. The hydrometer has a graduated scale on that tells you the specific gravity in relation to water. The more fermentable sugars in the wort the higher the specific gravity, and the higher the potential alcohol.
Here you can see the scale on the hydrometer. This is where you take your specific gravity reading. This recipe has a starting specific gravity of 1.048. You'll want to note this in your log book.
So here it is, the wort has been brewed, the specific gravity has been taken, and the yeast has been added. The airlock on top is to allow the CO2 to escape without letting any air back into the fermenter. Now it's time to wait 4 to 7 days and then transfer it to the secondary fermenter the glass carboy.
So check back soon as I'll keep the page update with pictures as the brew progresses.
Till next time.....
BACK